Series vs Parallel Solar Panels Explained (2026 Off-Grid Wiring Guide)
Solar panels rarely fail people — wiring does.
Thousands of off-grid builders install great panels but only see a fraction of the power they expected. The culprit is almost always wiring mistakes: mismatched voltage, undersized cables, or arrays that collapse when one panel hits shade.
This guide explains solar wiring in plain language: series, parallel, and hybrid wiring — when to use each, how to calculate safely, and how to get every watt your system can produce.
Understanding the Basics
A solar panel produces two electrical values:
Voltage (V)
Current (Amps)
How you connect panels determines what your array delivers to the charge controller.
The goal is simple:
Match your array’s voltage and current to the controller’s safe input range while minimizing wire losses and shading penalties.
Field insight:
Think of voltage as “pressure” and current as “flow.” Wiring changes how that pressure and flow behave across your system.
Series Wiring — Stacking Voltage for Distance

Concept:
Voltage adds together while current stays the same.
Example:
Two 200-watt panels
18 V, 11 A each
Wired in series:
36 V, 11 A
Voltage doubles, but current stays constant.
Higher voltage means lower current, which reduces energy lost through resistance in the cables. This makes series wiring ideal for longer wire runs between panels and charge controllers.
Use Series When
- Panels receive consistent sunlight
- Panels are far from the charge controller
- You want to reduce wire size and cable loss
Advantages
- Efficient over longer distances
- Smaller wire gauge required
- Strong performance with MPPT controllers
Drawbacks
- Shade on one panel affects the entire string
- Array voltage must stay below controller limits
Most MPPT charge controllers accept 100–150 V maximum input, so series wiring must always stay within those limits.
Important real-world note:
Cold temperatures increase panel voltage. A system that is safe in summer can exceed controller limits in winter if not calculated properly.
Example Field Setup
A small cabin installs four 200-watt panels on the roof.
Configuration:
2S2P
Two panels in series, two strings in parallel
Result:
Approximately 50 V into the MPPT controller with balanced current.
Efficient and reliable for small cabin systems.
Parallel Wiring — Stacking Amps for Shade Resilience
Concept:
Voltage stays the same while current adds together.
Example:
Two 200-watt panels
18 V, 11 A each
Parallel wiring produces:
18 V, 22 A
This configuration keeps voltage low but increases current.
Parallel wiring is less efficient for long distances but performs far better in partial shade.
Use Parallel When
- Panels experience uneven sunlight
- Wire runs are short
- Redundancy is important
Advantages
- Shade on one panel does not cripple the entire array
- Easier troubleshooting
- Lower operating voltage
Drawbacks
- Higher amperage requires thicker cable
- Each string must be fused
- Voltage drop increases with longer wire runs
Example Field Setup
An RV roof system with three 200-watt panels.
Configuration:
Parallel wiring with individual 15-amp fuses.
Output remains stable even when vents, antennas, or nearby trees partially shade one panel.
Field insight:
Parallel systems are forgiving. They may not be the most efficient, but they are often the most reliable in imperfect conditions.
Series-Parallel Wiring — The Balanced Approach
Most permanent solar installations use a series-parallel hybrid configuration.
Example:
2S2P
Two panels wired in series, then two series strings wired in parallel.
This arrangement balances voltage and current, allowing the charge controller to operate in its most efficient range.
Why Hybrid Wiring Works
- Voltage remains high enough to reduce cable losses
- Current stays manageable
- Shading on one string does not collapse the entire array
Example
Four 200-watt panels wired 2S2P produce roughly:
36 V at 22 A.
This works well for medium-size 24-volt systems or portable solar trailers.
This is the most common “sweet spot” configuration for off-grid systems.
How to Choose Series vs Parallel (Fast Decision Guide)
If you’re unsure which setup to use, this section cuts through the confusion quickly.
Choose Series If:
- Your panels are far from your charge controller
- You are using an MPPT controller
- Your panels get full, consistent sunlight
- You want to minimize wire size and power loss
Choose Parallel If:
- Your panels will experience partial shade
- You’re wiring a small system (RV, van, shed)
- You want simpler troubleshooting
- Your controller operates at lower voltage
Choose Series-Parallel If:
- You have 4+ panels
- You want both efficiency and resilience
- You’re building a permanent off-grid system
- You’re running a 24V or 48V battery bank
Simple rule:
If you’re building anything beyond a very small system, you’ll likely end up using a hybrid setup.
What Happens If You Wire It Wrong
This is where most off-grid systems quietly lose performance.
Undervoltage Issues
If your array voltage is too low:
- MPPT controllers won’t track efficiently
- Batteries charge slowly or inconsistently
- System feels “underpowered” even in full sun
Overvoltage Damage
If your array voltage exceeds controller limits:
- Controller can shut down instantly
- Permanent damage is possible
- System may fail during cold mornings (when voltage spikes)
Current Overload
Too much current in parallel setups can:
- Overheat wires
- Cause voltage drop
- Reduce system efficiency
Shading Collapse (Series Mistake)
If wired incorrectly in series:
- One shaded panel can drop output across the entire string
- You may lose 50–90% of output unexpectedly
Real-world insight:
Most people think they need more panels when in reality they just need to fix their wiring.
MPPT vs PWM — Why Wiring Matters
Your charge controller plays a major role in how wiring behaves.
MPPT Controllers
- Perform best with higher voltage input
- Convert excess voltage into usable current
- Ideal for series or series-parallel setups
PWM Controllers
- Match panel voltage directly to battery voltage
- Lose efficiency with higher-voltage arrays
- Better suited for small parallel systems
Rule of thumb:
- MPPT → use higher voltage (series or hybrid)
- PWM → keep voltage closer to battery (parallel)
How Panel Mismatch Affects Real Systems
Not all solar panels are identical, and mixing them incorrectly is one of the fastest ways to lose output without realizing it.
Even panels that look similar can behave very differently electrically.
What Counts as a Mismatch
Panels can differ in:
- voltage (Vmp)
- current (Imp)
- wattage
- age and degradation
When mismatched panels are connected together, the system behaves according to the weakest or lowest-performing panel in the string.
Mismatch in Series Wiring
In a series string, current must remain equal across all panels.
This means:
- the lowest current panel limits the entire string
- higher-performing panels cannot “push” extra current
Example:
- Panel A: 11A
- Panel B: 9A
Result in series:
→ entire string operates at 9A
This creates hidden power loss.
Mismatch in Parallel Wiring
In parallel systems, voltage must match.
If voltages differ:
- panels operate inefficiently
- energy is lost as heat
- system performance becomes unstable
Parallel systems are more tolerant of mismatch, but not immune to it.
Mixing Old and New Panels
This is extremely common in expanding systems.
Older panels degrade over time:
- lower output
- different voltage behavior
- reduced efficiency
When mixed with new panels:
- new panels are dragged down
- system balance becomes inconsistent
Best Practice for Expansion
If you need to expand:
- match panel specs as closely as possible
- keep new panels in separate strings when possible
- use MPPT controllers to mitigate mismatch effects
Field Insight
Most people don’t notice mismatch problems immediately.
They just see:
“my system feels weaker than expected”
But the issue isn’t panel quantity. It’s how they’re combined.
Simple Rule
If panels are not electrically identical:
→ don’t put them in the same series string
→ and be cautious combining them in parallel
Getting this right ensures your system produces what it’s actually capable of — not just what it looks like on paper.
Safety Rules for Solar Wiring
Solar wiring mistakes are the fastest way to damage equipment or reduce system output.
Follow these basic rules:
- Fuse each parallel branch — typically 15 A per string
- Ground all panel frames and metal structures
- Label array voltage clearly near combiner boxes
- Use proper combiner boxes when merging strings
- Keep wire runs short and direct whenever possible
- Only connect panels with matching electrical specifications
Pro Tip
Always calculate voltage drop before installing cable.
A good rule is to keep losses under 3 percent between panels and controller.
[Related: Off Grid Solar System Wiring Basics]
Common Solar Wiring Mistakes
These errors appear constantly in DIY systems.
Mixing different panel voltages in series
Exceeding the controller’s maximum voltage rating
Skipping branch fuses in parallel arrays
Using undersized wiring
Improper junctions or taped connectors
Each of these can reduce output dramatically or create real fire hazards.
Most system underperformance is traced back to one of these five mistakes.
Choosing the Right Wiring Method
| Situation | Best Setup | Reason |
|---|---|---|
| Long distance between array and controller | Series | Reduces wire loss |
| Frequent shading | Parallel | Panels operate independently |
| Medium sized arrays | Series-Parallel | Balanced voltage and current |
| Mobile systems or RVs | Parallel | Flexible and safer voltage |
| Cold climates | Series-Parallel | Avoids over-voltage spikes |
Real-World System Examples
Cabin Roof System
Six 200-watt panels
Configuration: 3S2P
Voltage: about 90 V into a 150 V MPPT controller
Battery bank: 48 V LiFePO4
Reason: long wire run and clear sunlight.
Vanlife Solar System
Three 200-watt panels wired in parallel.
Output:
18 V at roughly 33 A
Heavy 8 AWG cable connects the array to a controller mounted close to the battery bank.
Reason: shade tolerance and simple wiring.
Homestead Solar Array
Eight 400-watt panels wired 4S2P.
Output:
About 160 V at 20 A feeding a 200 V-rated MPPT controller.
Total array capacity:
3,200 watts powering a 48-volt off-grid inverter system.
Reason: balanced performance for distance and partial shading.
Quick Wiring Cheat Sheet
| Layout | Panels | Voltage Multiplier | Current Multiplier | Best Use |
|---|---|---|---|---|
| 2S | 2 | ×2 | same | Long cable runs |
| 2P | 2 | same | ×2 | Shade resilience |
| 2S2P | 4 | ×2 | ×2 | Balanced systems |
| 3S2P | 6 | ×3 | ×2 | Medium cabin arrays |
| 4S2P | 8 | ×4 | ×2 | Large homestead systems |
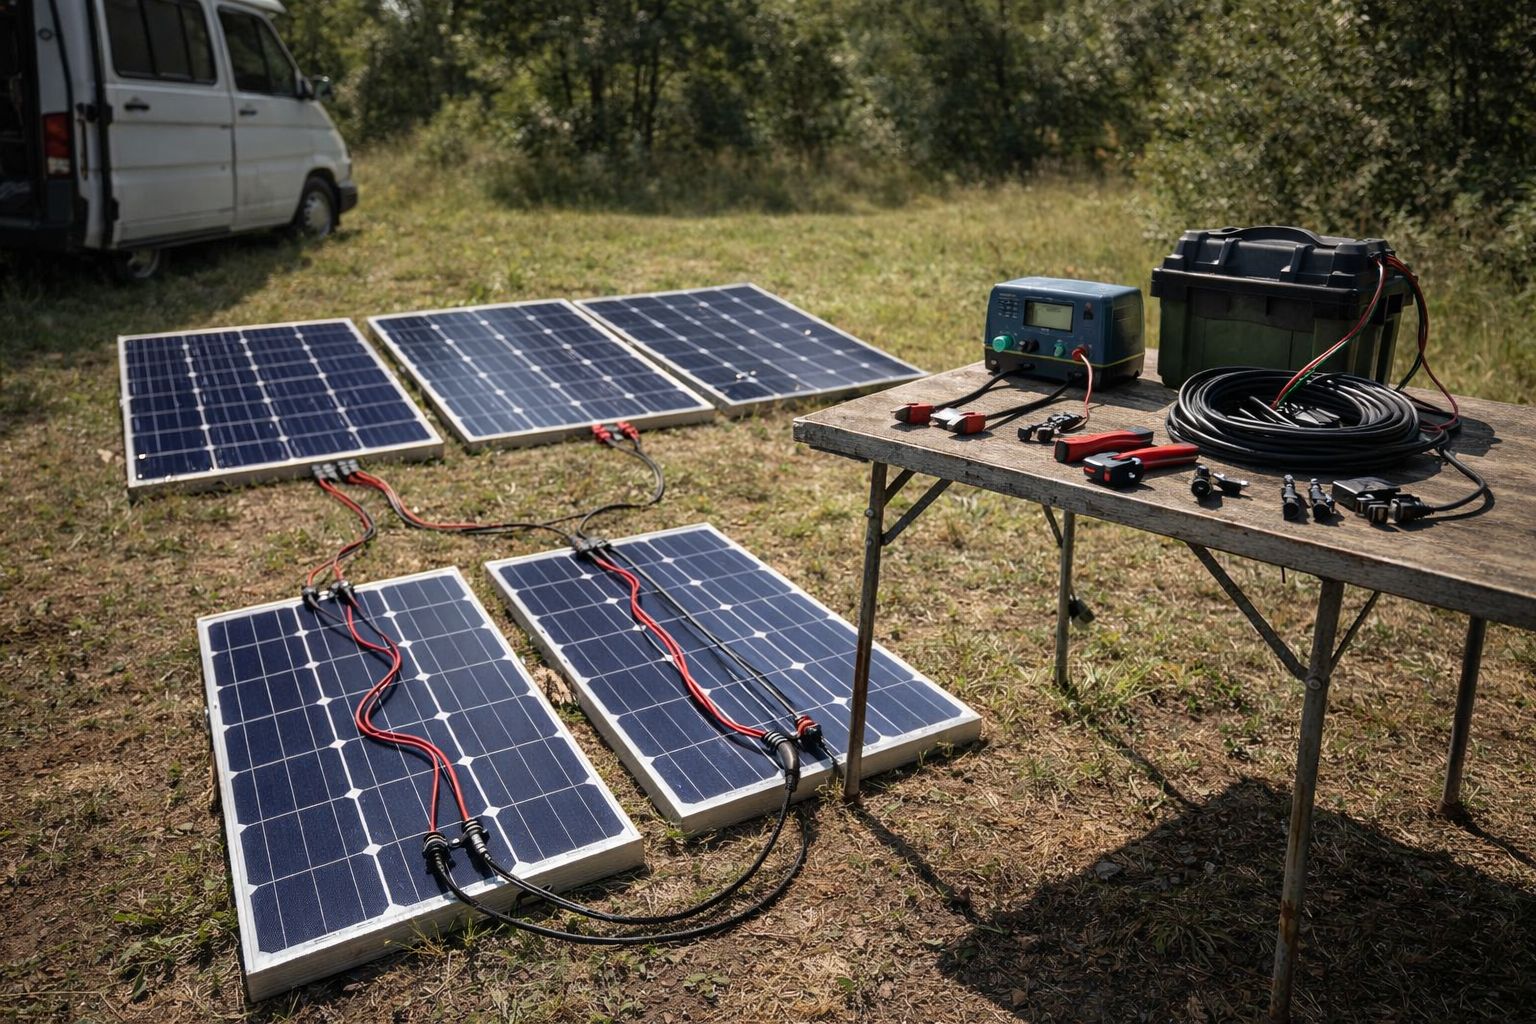
Step-by-Step Wiring Examples (Real Build Scenarios)
Understanding theory is one thing. Actually wiring panels correctly is where most people hesitate.
Here’s what it looks like in practice.
Example 1: Simple Series Wiring (2 Panels)
- Connect Panel 1 positive (+) to Panel 2 negative (−)
- Remaining free positive and negative go to the charge controller
Result:
Higher voltage, same current.
This is the simplest way to boost voltage for longer cable runs.
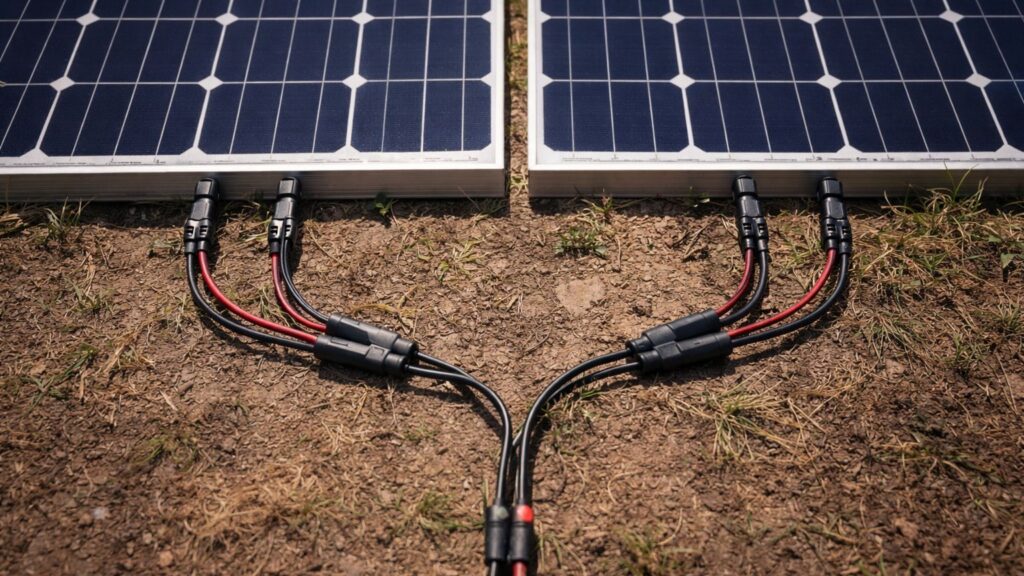
Example 2: Simple Parallel Wiring (2 Panels)
- Connect both positives together
- Connect both negatives together
- Run combined leads to the controller
Result:
Same voltage, doubled current.
Make sure to include a fuse on each panel line before combining.
Example 3: Series-Parallel (4 Panels – 2S2P)
Step 1: Create two series pairs
- Panel A → Panel B
- Panel C → Panel D
Step 2: Combine the two series strings in parallel
- Join both positives
- Join both negatives
Result:
Balanced voltage and current. Ideal for most off-grid systems.
Real-World Tip
Before making final connections, lay everything out physically and label your cables.
Most wiring mistakes happen not from misunderstanding, but from rushing connections.
How Wiring Affects System Efficiency
Wiring choice doesn’t just change voltage and current. It directly impacts how much usable power reaches your batteries.
Voltage Drop Losses
Lower voltage systems (parallel-heavy setups) lose more energy over distance.
This means:
- Less charging efficiency
- More heat in wires
- Reduced system performance
Higher voltage (series) minimizes this loss.
Charge Controller Efficiency
MPPT controllers operate most efficiently when input voltage is significantly higher than battery voltage.
For example:
- 48V battery system performs best with 70–120V input
- 12V systems benefit from 30–60V input
If your voltage is too close to battery voltage, you lose conversion efficiency.
System Stability
Higher voltage systems tend to:
- Deliver smoother power
- Recover faster from load changes
- Perform better in variable sunlight
Parallel systems, while more resilient to shade, can feel less “stable” under fluctuating conditions.
Bottom line:
- Series improves efficiency
- Parallel improves resilience
- Hybrid gives you both
Designing your wiring correctly is one of the highest-impact decisions in your entire off-grid system.
Troubleshooting Low Solar Output (Step-by-Step)
If your system isn’t producing what you expected, wiring is one of the first places to look.
Before adding more panels, walk through this simple diagnostic process.
Step 1: Check Voltage at the Controller
Measure the voltage coming from your array.
- too low → likely wiring issue or poor series configuration
- too high → possible overvoltage risk
Compare this to your expected array voltage.
Step 2: Measure Current Under Load
Use a clamp meter if possible.
- low current → shading, mismatch, or wiring resistance
- unstable current → loose connections or faults
Step 3: Inspect for Partial Shading
Look beyond obvious shade.
Check for:
- vent pipes
- antennas
- nearby branches
- debris buildup
Even small shadows can reduce output significantly in series systems.
Step 4: Verify Connections
Check all:
- MC4 connectors
- junction boxes
- combiner connections
Loose or corroded connections create resistance. This reduces output and generates heat.
Step 5: Confirm Wiring Configuration
Make sure your system matches your intended design:
- series strings wired correctly
- parallel branches properly fused
- no accidental cross-wiring
This is one of the most common causes of underperformance.
Step 6: Check Controller Settings
Incorrect settings can limit output.
Verify:
- battery voltage configuration
- charging profiles
- MPPT tracking behavior
Step 7: Compare Against Expected Output
Estimate expected production based on:
- panel wattage
- sun conditions
- system voltage
If you’re consistently far below expectations, something is wrong.
Field Insight
Most underperforming systems are not “too small.”
They are:
- miswired
- partially shaded
- or losing power through poor connections
Fixing wiring often recovers more power than adding new panels.
The Rule That Saves Money
Before buying more solar:
→ fix what you already have
You may already have the power — it’s just not reaching your batteries.
Field Wisdom

Series wiring favors distance.
Parallel wiring favors resilience.
Hybrid wiring balances both.
Label your wiring clearly, fuse every branch, and document your system layout.
A clean, organized solar array produces reliable power for decades — and ensures you get every watt you paid for.
If your system underperforms, wiring should be the first place you look — not the panels.